Welcome to South Africa's Audio Visual community!

Welcome to the home for South African audio and visual equipment owners and enthusiasts. Whether you are an audiophile or a hobbyist, feel welcome to join us in the exciting discussions about amplifiers, turntables, receivers, speakers, projectors, screens, restoration and new projects, product reviews, accessories, classifieds, and so much more!

  • The image upload funtion has been upgraded! Enjoy!

Custom Building a Yuichi Arai 290 horn (or two)

DIY and custom designed projects

naboo

Well-known member
Joined
Jul 9, 2023
Messages
606
Location
South Africa
Ever since seeing them for the first time on this forum, I have known that there would come a time for me to build a pair of these horns. That time came a bit quicker than I thought, and this thread will document the effort. I could find very few examples of how this is done, so I hope this helps some poor sods in future when they attempt something similar.

The horn was first documented around 1989 with instructions ina magazine. The "official" site is down, this is the best source at the moment:


It contains the original drawings with some (very small) pictures of a build example. This is what I use for the build.

I guess the lack of examples is because CNC is no longer out of reach of most people. I considered cnc'ing for some time, but eventually decided that I would enjoy (yeah, right) the challenge of building it by hand.
 
Thanks @Orcish75 . In case it's not blatantly obvious, I am trying to get my previous build thread back here... I wonder if I can even get some of the comments across. Let's see.
--------------
Best of luck Naboo! I'm very interested in following the progress of your build and wanted to commend you for approaching the project with an old-school style. Your commitment to traditional techniques is admirable, and I'm excited to see how it comes together. (y)
Thanks @Curlycat . Note that the "old school" decision is also somewhat informed. The point of the hifi hobby, for me, is the DIY part. Secondly, for resale etc., CNC is a much better option. But CNC is not without it's perils. You have to buy the design from someone who previously did the design. Then, a lot of CNC machines don't have enough leeway on the z-axis to make it work, so you may have to move the wood, which is risky. Eventually, it looked like "old school" might be as risky (where risk == time + money) as CNC.
--------------

Cool, it seems to work somewhat, I'll copy relevant comments across. Would like to thank my covert operator.
 
Making templates with Onshape
The easiest way to do this by hand, is to redraw the original plans to scale on a 2D CAD program, then print it out at the real size, cut the paper, trace it onto a wooden template, cut the template and use the template going forward.
You can download a full set of CAD files from here: diyaudio.com/community/threads/yuichi-a-290-cad-files-modifications-and-bem-simulation-results.382115/ but I was too much of a dumbass to figure out how to just get template sketch from the 3d stuff, so I redrew it. Note that I am new to CAD - taught myself Fusion360 for the "Sunflowers" build elsewhere is this diy forum. I also didn't have houtwerk at school and I consider drawing a stickman a proper challenge.
Once I had re-trained myself in Fusion, I wanted to print this thing (need an A1 printer - or A2 perhaps, can't remember exactly). There are plenty of printshops around these days and they charge about R20 or so for a print of that size. Unfortunately they don't want you connecting your laptop to their printers etc, so you have to provide them with a PDF. No problem, Fusion has that PDF button thingy...Oh, hang on, that is only in the paid version. This was followed by around a week of exporting, importing, pirating, asking favours and generally just being frustrated. I have no problem with paying for software but to pay a couple of grand for something (annually) that I hardly ever use is not an option.
I delved into other CAD packages and it seemed that Onshape could do what I wanted (export to PDF) in the free version. The only limitation in the free version on Onshape is that your design is in the public domain. In my case that is no problem at all. The software works very musch like Fusion 360 but was a bit more intuitive for me. It runs in-browser with heavy lifting happening in the back-end, so it was very responsive on th 9 year old Macbook pro that I use - much better response than Fusion. I really like Onshape - and it doesn't require you to go through some licensing hell every couple of months. Really awesome, I won't go back to Fusion. Check it out: cad.onshape.com
Here is the link to my sketch - use at your own peril, no guarantee that this thing is even correct! Onshape

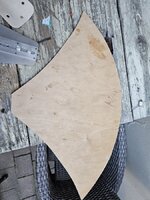
Right, finally PDF'ed the bastard, printed it out and carefulle cut out with scissors. Then transfer onto thin plywood, jigsaw the thing, sand it a bit and we have a template for the largest size of the horn. Basically, at this stage I am following the instructions on the site linked in the original post (araihorn.com).

25541-20230520-105834.jpg


Now you have a template.
 
Cutting the plywood
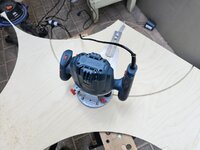
I am making the horn from Birch plywood. At Leroy Merlin I found 15mm sheets for R2 000 each. You need two 1220x2440 sheets for this build. This was my first time working with Birch plywood, and what they don't tell you is how hard it actually is, compared to something like MDF. I traced the template onto the plywood, then cut it out with a jigsaw (slightly bigger). Then clamp the template onto the cutout and router with a straight bit with a bearing on it to achieve the correct shape.

25543-router-bit.jpg

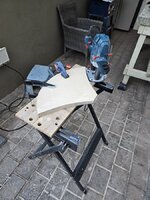
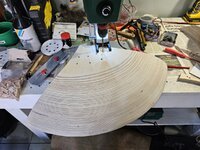
Unfortunately using the thin plywood as a template was riddled with issues - it gets stuck between the bearing and router bit, or the bit catches it and does it's own thing etc. Eventually I decided to take @Chingy 's circle jig and cut out the 95deg arc directly onto the plywood, then cut sides with a jigsaw and have a proper 15mm template. The 403mm radius strecthed the jig to its limit! As you can see in the pic it is important tofasten the screws of the jig tightly :)

25546-20230526-123813.jpg


25548-20230601-071459.jpg

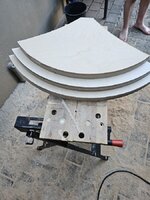
Now you can use that one as a template for the others - jigsaw, router, repeat. You need four of 30mm thickness, so if you're using 15mm plywood, that comes to 8 pieces. After cutting those you might start thinking about changing your hobby. Especially when you mess up a piece or two!

Now, after those eight you repeat with a slightly smaller radius (can't remember the exact radius now, will add tomorrow) and then again with a slightly smaller ratio. Twenty-four pieces in total. Ho-hum life is fun.

25549-20230601-093132.jpg

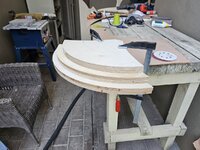
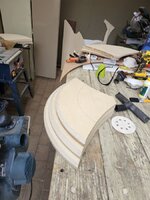
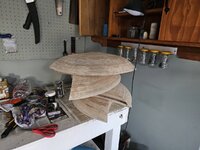
On the pic above is six pieces which will make one half of a horn when glued together and planed.
 
A word on jigsaws
You need the right tool for the job. My 15year old cheapest-I-could-find Black&Decker jigsaw is not the right tool to cut birch plywood. I thought I'll get away by using quality blades, but the saw overheated and blades snapped. It was like trying to open a can of baked beans with a spoon. Eventually, the jigsaw broke. I went to Chamberlains (I only buy tools there - the people actually offer help and they have good advice - unlike Leroy or Builders). Ended up with a Bosch GST700 and it is a wonderful machine. Don't be fooled by the higher KW of the Ryobi's, the Bosch runs cool and is highly accurate. Cutting was a breeze after this, with the correct blade (lots of little teeth, like a Piranha - not a hippo job).
 
Let's bring across a compliment ;)

Martin, I can’t tell you how impressed I am with your ingenuity and tenacity. When you get this build right you will have a speaker that very little can compare to.
Thanks Sean, I have to blame you for getting me onto this path 🤣. Couldn't be any happier though, enjoying it thoroughly.
 
...and let's hope the DIY section in this forum sees a LOT of action!

Nice to see the Chingy Jig in action.
Well done on the progress also
We need some builds to get the diy section active again
I
This is the limit of the jig, had to slide it out of the guardrails! But as long as you tighten the nuts properly, PROPERLY, you are good.

As far as the DIY section is concerned, I'm trying my best 🤣. I often feel like I joined the forum after the "golden years" but at least some of those builds are documented.

I also feel there might be quite a bit of diy going on that we don't see. I want to encourage those guys to post anything, even if it's just the final result.
 
Some safety tips were shared...

With all that cutting and noise I suggest you consider:

a) Wearing a mask to protect your lungs from the airborne dust - you will most likely only notice it when you lying in bed at night
b) Ear muff to protect your ears - it cannot be repaired
c) Consider wearing long jeans - if something (warm) breaks or shoots at you, the cloth offers some protection and
d) Never work with power tools whilst barefoot.
Thanks. Tick, tick, eish, tick.

If you notice bare feet anywhere, it is most likely my boy who held something for me.

I don't always wear jeans, at my own peril.

You forgot safety glasses from the list. The dust makes red, scratchy eyes. If you have any tips to keep goggles from fogging whilst wearing a mask please share!
 
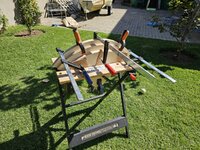
Clampiddy clamp clamp...
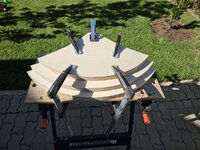
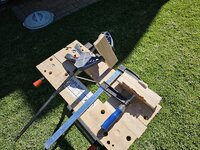
It took me a while to remember that the little Black and Decker workbench is, in fact, one large clamp.

At first, I clamped like this:
26144-20230601-101422.jpg

Later, I realised this is much more effective:
26145-20230605-120427.jpg
One of the issues of clamping all six pieces together at once, is that they slip and slide. There are two things you can do about that - let it sit for fifteen minutes or so before clamping, or (and this is more effective) only glue two pieces at a time, wait an hour or for it to settle nicely, add another piece, and so on. Leave it clamped overnight. The latter method is of course great, but it's not so obvious in the moment. At least, not for me.
 
The next step is to shape the horn. This had me very nervous - it looks like it's very difficult, and if you FF it up, there is no undo button. I don't have much patience so I just dived in. Luckily, it was a lot easier than I thought. Start with the planer on about 1.5mm and once the edges are gone go down to 0.5mm and if you're scared stop and carry on tomorrow. Even go as low as 0.1. If you just follow the contours consistently, it actually comes out very nice.

I honestly thought this would be the hardest part of the build, but it turned out to be easy. First, clamp the piece on the corner of a sturdy table.
26146-20230604-112938.jpg
Plane a little bit.
26147-20230603-114224.jpg
That's it, keep going until your arm feels like you're back in puberty. Do a bit of sanding for the obvious defects (after your arm has rested a bit).
26148-20230603-122824.jpg
Before you know it, it's done and *coughs* dusted.
26149-20230607-170159.jpg
 
Hi where can i get the drawings?
Hi

Depends what you want. If you want to cnc then search on diyaudio, someone had plans there but it was a little tricky to find, shout if you can't find them and I'll check where it was.

If you want to cnc a non-standard size, it'll be a couple of dolores: Custom Yuichi A-290 Biradial 3D CAD Model --- Make Any Size!!

If you want to print templates from my drawings (no responsibility accepted whatsoever, hackjob to achieve an outcome) : Onshape
 
And that is us all caught up ... not too much trouble bringing it across, but I still hope techadmin idiot chokes on his anchovy breath.

Naturally, I have progressed further - will post an update soon.
 
You'll not see nothing like the mighty fin
Some of these horns do not have fins. My rudimentary understanding is that fins provide better horizontal off-axis response - something that is important in my environment. From the araihorn website:

"As the horn use fins, it maintain an open directivity upper, fins are really important in this design with these opening coverage and allow a Constant Directivity pattern. Each fin create a horn cell by division, each horn cell must be identical, symmetrical and have the same point of origin.

Yuichi made Arai horn without fins but mainly for mid-range application as he said, for full range it doesn't make sense, specially for the big A290. Due to her smallest size the A480 is less impacted, but still impacted, to fins removal."


So, being afraid that things may not work out perfect, I decided to create fins. Some (including the araihorn website) reckon the best way to create fins is by using a belt sander. Blah. What the hell do they know - we don't live in the stone ages here - this looks like a job that's perfect for the dremel CNC project I did at the start of the year.

I feel the need to post a video of my dremel cnc working - a practice round on MDF - but I can't seem to upload video. Anyway - epic fail - dremel was not built for this job - it will take forever to get it done!

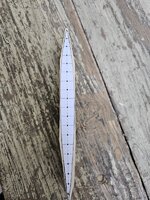
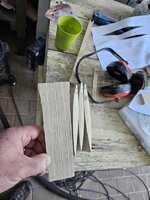
Plan B - why not try a belt sander! Yes, that sounds like a plan. The fins need to be 50mm high and plywood is 15mm so need to laminate 4 pieces high.

20230616_105023.jpg

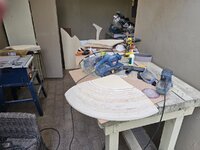
Then put a little picture on the block, and cut it roughly with a mitre saw.

20230624_122704.jpg

Now, it is ready to be sanded on the upside-down-mounted-belt-sander.

20230624_122716.jpg

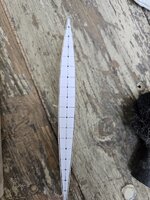
Almost perfect. Careful, a slip of the hand and you have to restart. Careful, a slip of the finger and you need a plaster (rather wear gloves from the start). On a positive note, the police won't be able to identify me by fingerprint on at least three fingers now.

It is difficult to put into words how much time I spent on these #$%^$$^%& fins. You are seeing the tip of the proverbial iceberg - but in the end it seems to have worked out ok.
So, 4x15=60mm high fins, and I need 50mm high. Good thing there is some spare space. While the fins' top and bottom should be flat according to the design, old dumbass here was a bit aggressive with the horn curve, taking it too far back and now we need to decide whether to fill in gaps with plastic wood (loser) or to curve the fins (hero).

I curved the fins. Like I said, tip of the iceberg.

20230702_104106.jpg

And speaking of icebergs - I know, it's Quinn the eskimo, not fin. But that didn't fit my story, and I'm allowed one mondegreen per day.

Mondegreen

1689704316556.png
Wikipedia
https://en.wikipedia.org › wiki › Mondegreen
 
Gluing BB in this manner is not a good idea - the wood breaks very easily

Laminate BB

Consider soaking the pieces in layers of varnish to strengthen the bond.
I find it very strong, actually... But if you don't glue it, what do you do? This entire project is literally glued together.
 
What I mean is that narrow pieces of BB glued together as you have done in the picture is not very strong - the moment you apply pressure on the sides it prone to break. As the wood is very porous my suggestion is that you apply multiple layers of varnish to to enable the wood to absorb the varnish- hopefully that will provide additional strength
 
I get you, I will make sure they have a proper lick of veneer. But, I tried today to break one that I am not using, it will have to be some serious force, I couldn't manage it.
 
A last word on the fins...

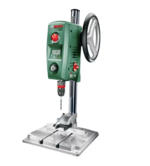
I find reasons to buy stuff, like most people on this forum. I felt that the fins cannot, and will not stand the test of time unless they get support. This had to be in the form of dowels. And to get the dowels in, a hand drill could mess up all this work that I've put in so far, so I need a drill press.

There goes another two weeks down the FB marketplace hunting, researching, moving from one price extremity to another. In the end this machine won:

Screenshot 2023-07-24 at 19.12.09.png

I struggled motivating the cost to myself, but, you know, I got over it pretty quickly ;)

Anyway, two dowels per fins per side should do it. That means drilling 32 holes per speaker. No problem with the press, went quick and easy.

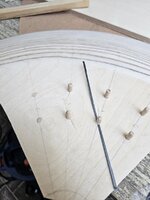
Unfortunately, the level of accuracy required to align these things seem to be out of my grasp. I have tried my best, filled in the holes with dowels, drilled them again, and still I was unable to get it perfect. It is important to note that this is not a limitation of the machine, but of the operator.

So, I give up. using only one of the holes per fin seems the way I'll end up going. Biscuits have more flexibility and I think at the end of the day, that would have been the wiser option in this case. Anyway, so it goes and so I learn a little bit more every time.

Here are some photos of this particular cockup:

20230702_113344.jpg

20230716_122650.jpg

So - I am moving forward now - I can't possibly spend more time on fins - next time will be much, much faster.
 
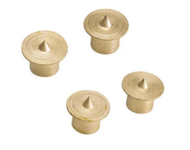
OK, so a bit late now, but next time get y'all some of these:
566x566.png
They come in all the common dowel diameters. Drill holes, put these locating pins into holes, line up the other piece, press down and hey presto! Drill where the pits are... Had great success with these.
 
Back
Top